Custom Reports can be created for:
Click on the tab in the horizontal tool bar for the category of report you want to build.
Limiting Data Displayed on Custom Reports
Whenever you design a custom report, the data for the report will, by default, use the data displayed in the current window.
If you wish to limit which vehicles, deals, or customers are displayed on your report, apply Quick Filters or Advanced Filters .
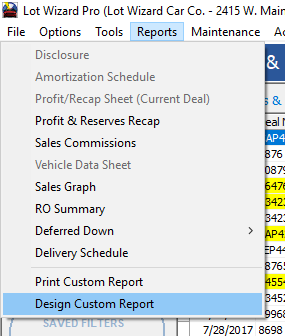
To open the Report Designer, click 'Reports' in the top horizontal tool bar, and select 'Design Custom Report', OR click 'Report Designer' on the left side of the screen.
The Report Designer window will appear. If you would like to begin designing another new report, click File in the upper left corner, and select New Report from the drop-down menu.
You can also use the File drop down menu to load, delete, or preview a report.

Next, select an option from those listed in the upper left corner:
➢Report - builds a report that can be printed or viewed on the screen. See below.
➢Mailing Labels - only available within 'Customers' or 'Deals & Quotes'.
➢Data Export (Tab Delimited) -- creates a data file to be exported to your local computer for use in spreadsheets such as Microsoft® Excel.

To build a report for viewing on screen or printing:
Fill in a title, and start building the report by adding and choosing fields.
In the example below, the report will show customers from Lebanon, PA. (Customers were sorted with a Quick Filter first), and will display their full names, deal numbers, makes of vehicles, and deal date in each line.
Click here to find out more details about setting up and editing fields.
Other options are available in the lower right corner.
Saving the Report
To save the report, click the 'Save' button at the bottom.
A window will open asking you to type in a name for this report.
After saving, the report name will appear in the box at the top of the window.
The next time you run the report, it will use the data showing currently on your screen. You may need to reapply filters as needed.
Click here to find out how to attach a saved filter to the report.
